Create & Manage Entities
Set up a new entity.

Written by Grainne Reidy
Updated at October 28th, 2026
Introduction
Multi-Entity Accounts vs. Individual Entities
The information in this article is only relevant for multi-entity accounts, such as Accounting Firms, Franchise Owners, Group Companies, and Outsource Service Providers.
If you have a single entity, this will have already been set up by your system provider.
Billing
If you have queries regarding billing, contact your account manager.
Permissions
To set up a new entity, you must be an admin user with the Add Entity permission selected.
For more information on user management, see Create & Manage Users.

See:
▶️ Company details and settings (2.1) - AIQ Academy
Create a New Entity
Further Information
Refer to Company Details & Settings for detailed field explanation in combination with the information below.
- In the account layer, go to the Entities tab.
- Click on New Entity.

- Under Select Template Company, select either a standard template or saved template:
- Standard templates: These provide a basic entity structure for the locale currency, date format, language, tax details, computations, and reports.
-
Saved templates: If you have previously saved an entity as a template (see ‘Edit Entity Details’ section for more details), it will be available for selection here, including its Chart of Accounts with GL Codes. Under Saved Template Copy Options, select any data you wish to include:
- Dimensions, Codes, Tags
- Customers
- Suppliers
- Inventory
- Tax Codes

- Click Next Step.
- In the Company Details tab, complete the details of your entity to appear on documents such as Invoices or Statements. In the Upload Logo field, any logo you select will also appear on select documents.

- Click Next Step.
- In the Settings tab, select your Entity Type and other settings used by the system. The following entity types are available:
- Lite: For dormant or low volume trading entities with a maximum average of 80 transactions per month over a 12-month period. If transaction volumes exceed this average 80 monthly limit, the entity must be upgraded to a full entity. Please discuss with your Account Management or Support before updating the setting to Full.
- Full: For regular trading entities with an average of over 80 transactions per month for a 12-month period. Consolidation entities are automatically classified as Full entities.
-
Sandbox: Designed to replicate the live environment of a full trading entity so relevant employees can train, test new features, or test integrations. One Sandbox is included in Growth and higher product plans.

- Click Next Step.
-
Under the Financial Year Setup tab, use the dropdowns to create the Financial Calendar.

- Reporting Periods: It is only possible to have 12 monthly periods in a financial year.
-
Financial Year: This is an important setting which you should confirm with your accountant as it determines your reporting schedule. Once set, it can only be updated via support. See Financial Year End Change for more details.
Consolidated Group Financial Years
If you are creating a consolidated group, all entities in the group must have the same year end.
- First Open Month: The system will automatically consider all prior periods as closed from a data entry and reporting point of view. If you have balances, these can be imported during the onboarding process using the Opening Financial Position Data Importer.
- First Open Year: The system will automatically consider all prior years as closed from a data entry and reporting point of view. The First Open Month will be applied to the year selected here.
- Click Next Step.
- Click Create Company and wait for the process to complete.

- The Main Settings section displays your new entity's name. When you set up users, they will receive a login for this Entity ID. For more on setting up users, see Create & Manage Users. Click Close.

Next Steps
The following codes were added during initial entity setup:
- General Ledger Codes for posting accounts with their Categories and Sub Categories.
- General Ledger Codes for System Accounts.
And optionally, you may have added the following:
- Dimensions, Codes, Tags
- Customers
- Suppliers
- Inventory
- Tax Codes
See the next section to modify and expand your codes and settings to ensure the entity meets your business needs.
Complete Entity Setup
Prerequisite: User Permissions
Ensure the relevant users have access to the screens referenced here via the Manage Profiles screen:
- Company Details & Settings
- Codes Maintenance
- System Defaults
In addition, enable any permissions for other settings you want to use now.
See Create & Manage Users for more details.

Step One: Log into the new Entity
Log into your newly created entity by clicking on the Entity ID. If you are presented with a System Defaults screen, you can close it and complete it later as needed.
Step Two: Set up Essential Codes and Settings

Go to Setup and complete the following:
- Company Details & Settings: Here you can view the Company Details & Settings data created during entity setup, in case you need to edit any details. See Company Details & Settings for complete details.
-
Codes Maintenance: This is the central location to set up and manage coding. Complete these tables as comprehensively as possible to get maximum benefit from the system and its Sales Analysis Reports. See Codes Maintenance for more details on completing these fields. Ensure the following are set:
- Currency Codes: For more details, see Managing Multiple Currencies.
- Tax Codes: Ensure the rates are up to date as they determine how transactions will be treated in the statutory VAT Returns preparation process. For more details, see VAT Code Guide (UK & Ireland).
- Set System Defaults: Here you can set defaults for customers, suppliers, items, and GL Accounts. This saves time and helps maintain consistency. Complete any details necessary, referring to System Defaults for more details.
Step Three: Set optional Codes and Settings
The following are all optional and can be configured at any time:
- Automations: Manage purchase related automations. See Auto-Emailing PO Automation and Approval Reminders Automation.
- Document Customisation: Ensure customer facing documents meet your branding requirements. See Document Customisation.
- AP Inbox Configuration: Automate supplier invoice creation and order matching. See AP Inbox Configuration & Management.
- Data Connections: Extend the reporting capabilities of the system. See Data Connection Setup and OData with Excel.
- Sales Representatives: Manage your sales team's commissions. See Sales Representatives.
- Dimensions: Flexible Analysis to meet your business needs. See Dimensions Codes / Tags Setup.
- Approval Workflow: Control the purchasing process. See Approval Workflow Setup.
- Non Financial Metrics: Add further analysis to your financial figures. See Non Financial Metrics

Step Four: Maintenance
Use the screens outlined above to maintain your data and ensure the settings fit your evolving business needs.
Edit Entity Details
The Edit Entity screen lets you edit data specific to an entity.
- In the account layer, find the entity you want to edit.
- In the Actions dropdown, select Edit Entity.

- Ensure all the details are correct in the Edit Entity Details screen:
-
Entity Details: Name and Entity Type are mandatory.
- Name: Make the Name relevant to its purpose, for example, for a Sandbox, add the text ‘Sandbox’ before the entity name for easy recognition.
- Entity Type: Lite, Full, or Sandbox.
- Contact Information: Email is mandatory.
-
Entity Configuration:
- Locale
- VAT Registration No: This number comes from Revenue/HMRC.
- Group VAT Reporting Entity: If this is a VAT Group Entity, enter the Group VAT Reporting Entity ID in this field. Note, only the designated VAT Reporting entity can be linked to HMRC for VAT return submissions or used to report to Revenue. Repeat for every trading entity in the VAT Group, including the VAT Reporting Entity itself. Non-trading consolidation entities are not used in VAT reporting. See Group VAT Return Setup (UK & Ireland) for full details.
- Entity Active: Untick to deactivate or tick to reactivate the entity. This will not delete the entity or unassign any assigned users. Note, deactivating entitles that are part of consolidation groups will not remove the entity from the group but will impact consolidated reporting. The entity can also be deactivated using the Actions menu (see Deactivate/Activate an Entity). The impact on billing will depend on the number of contracted entities. If the number of active entities remains at or below the contracted number, there will be no change to billing.
- Use as Template: Set the Entity as a template when setting up other Entities. This will include any of the assigned Dimensions/Codes/Tags, Customers, GL Codes, Suppliers, Inventory, and Tax Codes. This saves time and increases accuracy across all entities in the account. This can benefit Franchisers, Consolidated Groups, and Companies in the same industry that require similar Charts of Accounts, Analysis requirements, Stock Items, or Suppliers.
-
Entity Details: Name and Entity Type are mandatory.
- Click Process. For the designated reporting entity, the Group VAT Reporting Entity field will be updated to “This entity is designated as the Group VAT Reporting Entity.”

Create a Custom Login URL (optional)
Step One: Embed the Login in your site
Make a login available on the corporate website. Contact support for advice. Our development team have generic templates that your developers can incorporate.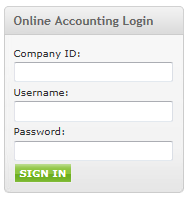
Step Two: Give the Login a branded URL
The first part of the URL is fixed, generic, and chosen by the organization hosting the system and cannot be changed, for example, “https://hostacct.com”.
If you want a branded URL, provide a system name to support and our development team will combine it with the generic address. For example, “hgacloudaccountingsystem” would create https://hostacct.com/hgacloudaccountingsystem.
Next Steps:
Add the Custom URL to your account as described in the next section.
Edit Account Details
Account Details impact all entities in your account.
- In the account layer, go to Setup > Group Details.

- Ensure the following are correct:
-
Account Details:
- Name: This is mandatory.
- Address: Optional.
- Session Timeout (Mins): When users log in to the system, a session is established. For the duration of the session, users won't need to re-authenticate. By default, the session ends 240 minutes after login, regardless of activity. Update the time here if required. When a session expires, the system will prompt the user to log in again.
- Contact Information: Name is mandatory. Add optional email, phone, and fax.
-
Support Information: If you want to handle your own Support, add Support information here. Then when your users go to Support in the system, they will be directed to your team rather than AIQ.
- Primary Support Email: Primary email address to which requests will be directed.
- Add Secondary Support Email: Alternative email address to which requests will be directed.
- Support Site: Copy the web address URL of the required support ticketing system into this field. If this field is populated, the system will open this URL when the user clicks 'Support' within the system.

-
Account Details:
- Use the optional White Labelling toggle to access the following:
- Custom Login URL: If you created a Custom Login as described in the previous section, add it here. This is the Login page of the corporate website. It is important to enter this correctly to ensure your client users will be redirected to this branded page when they log out. In addition, new or existing users who create or reset their passwords via the password reset page will be redirected here. Contact support for further information.
- Terms & Conditions URL: Embed a link to your organisation's website terms and conditions.

- Click Process.
Other Account level settings
The following are optional and can be set any time as fits your needs:
- Single Sign-On: This can be used instead of our legacy login. See Single Sign-On (SSO).
- Integration Application: All new integrations are set up from here and managed in our developer portal. See Create & Manage Integration Applications and Developer Portal & API.
- Delete Profile: Profiles are used as part of user management. This lets you delete profiles at account level. See Create & Manage Users for more information.
- Agentic Opt-In: This lets you enable Smart Agents for all entities in your account. See Smart Agents - Beta for more details.
Deactivate/Activate an Entity
Note, deactivating entitles that are part of consolidation groups will not remove the entity from the group but will impact consolidated reporting.
The impact on billing will depend on the number of contracted entities. If the number of active entities remains at or below the contracted number, there will be no change to billing.
- In the account layer, find the entity you want to deactivate or activate.
- In the Actions dropdown, select De-activate Entity or, if already deactivated, Activate Entity. This will not delete the entity or unassign any assigned users.

Register an Entity as 'to be deleted'
- In the account layer, go to Actions for the relevant entity. Select Edit Entity to open its details.

- In the Entity Name field, add the text ‘To Be Deleted’ before the entity name for easy recognition.
- Untick Entity Active.
- Click Process.

- Contact Support and they will manage the deletion request.